Every facility or organization uses a wide range of physical assets - HVAC systems, furniture, IT equipment, power units, and more. Tracking and maintaining these assets is essential for smooth operations, reducing downtime, and ensuring that each asset is used efficiently throughout its lifecycle.
The Asset Management module helps you organize, track, monitor, and maintain all assets—from acquisition to disposal. Assets can be managed either at the Facility level or the Organization level, depending on where they are deployed.
With Asset Management in Apptimus, you can:
- Configure asset-related settings such as groups, specifications, statuses, conditions, tags, and service groups
- Add and organize assets at the facility or organization level
- Assign maintenance templates to automate recurring maintenance
- Monitor asset health and upcoming maintenance through Asset Events
- Download or upload asset information through scheduled reports
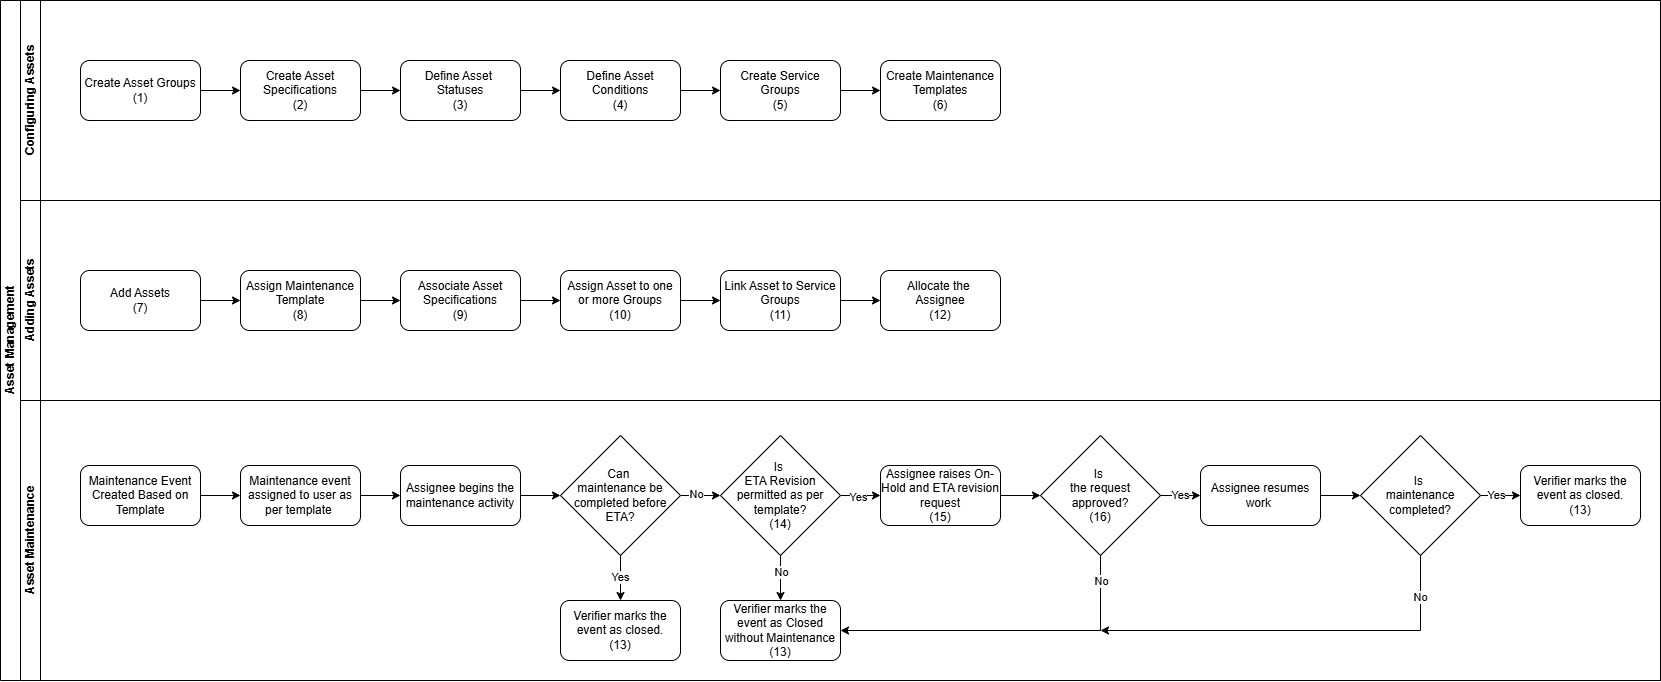
Managing assets involves the following steps:
- Configuring asset-related settings
(groups, specifications, service groups, tags, statuses, conditions, maintenance templates) - Adding the assets
(adding assets, updating them, generating reports, viewing events) - Performing asset maintenance
(automatic event scheduling, updating maintenance status, ETA revision, closing event)
Asset Configuration
Whether you configure assets at the facility level or the organization level, the configuration process remains the same. These configurations must be completed before adding assets to ensure assets are classified consistently and maintained in a structured manner which enables a smooth, reliable maintenance workflow.
- Asset Groups: Grouping allows you to classify assets into logical categories such as Furniture, HVAC, IT Equipment, etc. You can create such category-level groups and add child groups under each category. For example, Desks, Chairs, and Tables under Furniture.
- Asset Specifications: Specifications help define technical or product-specific attributes. These are especially useful for electronic or IT items. For example, Make (Dell, Lenovo), Model (Latitude Series, ThinkPad Series), Hardware Type (HDD/SSD, RAM Size, Display Type), and so on.
- Asset Status: Status indicates how an asset is currently being used. For example, Allocated, In Use, Not in Use, and so on.
- Asset Condition: Condition reflects the physical state of the asset. For example, New, Good, Needs Repair, Broken, and so on.
- Asset Tags: Tags allow you to apply asset-level labels for access control or category filtering. For example, within Laptops, you may add tags such as Accounts, HR, or Training to restrict visibility or access.
- Asset Service Groups: Service groups determine which types of service requests can be raised for an asset. For example, Repairing, Servicing, and so on. Service groups also define who can create or receive requests related to an asset, based on the service groups assigned to users.
- Maintenance Templates: Maintenance templates define how often an asset needs servicing, who will perform it, and how reminders and approvals will work. Templates include the maintenance cycle, frequency, assignee, notifications, and escalation options. For example, a generator may require quarterly maintenance, and a maintenance template can automatically create four events a year and assign them to the vendor responsible.
Adding Assets
Once configuration is complete, assets can be added individually or in bulk.
When adding an asset, you can:
- Assign it to one or more groups
- Associate relevant specifications
- Assign the maintenance template to automate recurring maintenance schedules
- Link it to service groups to ensure correct support teams are notified
Once assets are added to the system, you can:
- Filter and search assets
- Edit asset information
- Download QR codes
- Schedule asset reports for download or upload
Understanding the Asset Maintenance Workflow
The maintenance lifecycle of an asset is automated through maintenance templates and monitored via Asset Events.
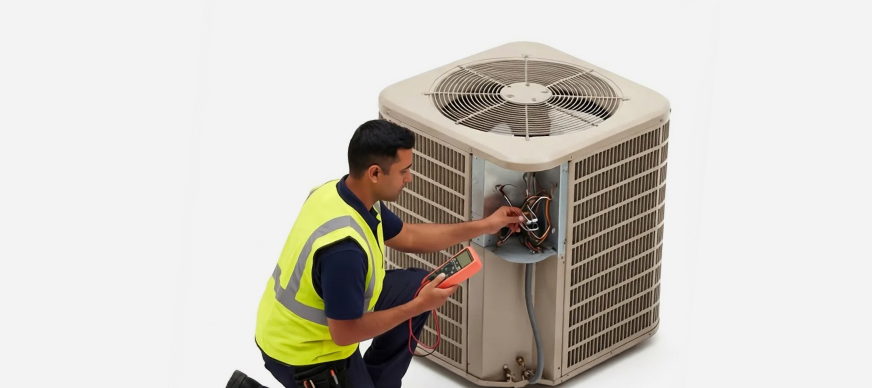
Let us understand this with the help of an example of an AC unit that has a maintenance template with a monthly cycle assigned to it.
- Automatic event creation
The maintenance template associated with the AC unit automatically creates 12 maintenance events for the year. - Event assignment
The maintenance event is assigned to the user/vendor assigned in the maintenance template. The assignee receives reminders and notifications when maintenance is due. - Maintenance activity begins
The assignee starts working on the maintenance activity begins, and the event moves to a “Queued” state indicating that maintenance is in progress. - (Optional) Raising an On-Hold Request and Requesting ETA Extension (If permissible)
The assignee can request the asset event to be put on hold and request for a revised ETA (only if allowed as per the maintenance template configuration). - Addressing On Hold and ETA Extension Requests
Users assigned as Approvers in the maintenance template receive notifications for On-Hold and ETA extension requests and can approve or reject the request. - Supervising the Event
The user assigned as the supervisor supervises all maintenance activities. - Closing the Event
Once the maintenance event is complete, the user assigned as verifier can mark the event closed with one of the following statuses:- Closed: When the maintenance event is closed after completing the maintenance. The following statuses are updated automatically based on the ETA and SLA conditions:
- Closed Without Delay
- Closed With Delay
- Closed With SLA Breach
- Closed Without Maintenance: When the maintenance event is closed without completing the maintenance.
- Closed: When the maintenance event is closed after completing the maintenance. The following statuses are updated automatically based on the ETA and SLA conditions:
Note: Refer to the legend below the image for links to documentation for each of the processes.