
In this section, you will learn how to :
- Edit meeting room booking details
- Check-in against a meeting room
- Cancel a meeting
- Release a meeting room
Editing the Meeting Room Booking Details
Once a meeting has been scheduled, you can update the following details:
- Meeting title
- Participants
- Time (only if it has been configured in the profile associated with the meeting room)
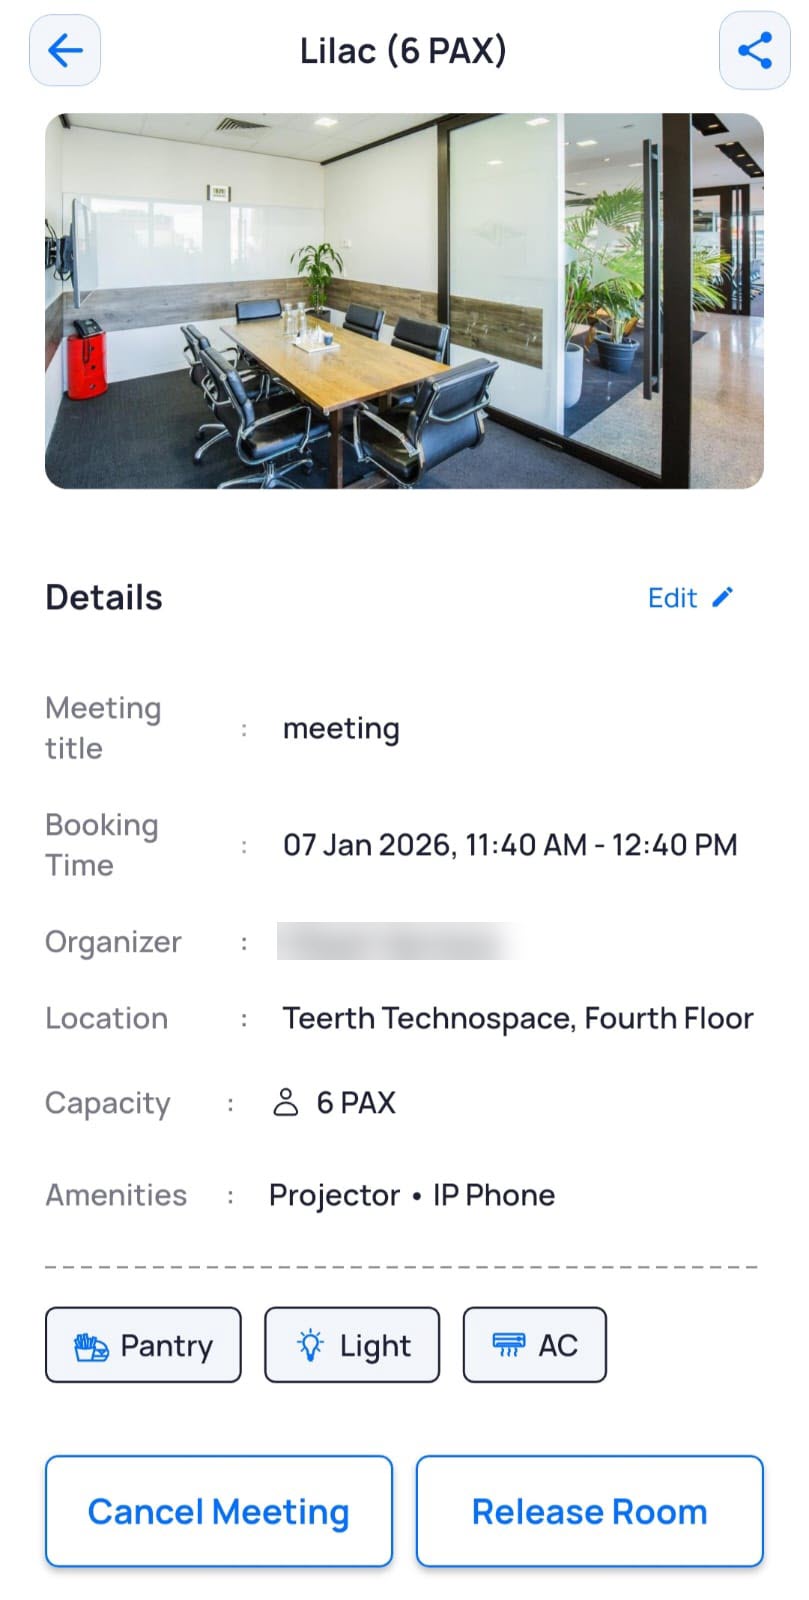
- In the Meeting Room module, under the Upcoming tab, tap the meeting you want to edit.
Note: You can also access details of the meeting rooms booked for the current date from the Dashboard, under Today’s activities.
- Tap Edit.
- Update the Title of the meeting as required.
- Update the Time of the meeting as required.
- In the Invite Participants field, add or remove participants as required.
- Tap Save & Continue.
A confirmation message is displayed, and an email is sent to all participants with the updated details.
Checking-in Against a Meeting Room
Before the start time of the meeting, the organizer of the meeting receives a Meeting Room Check In Reminder email as well as a notification on the phone that gives meeting information and the steps for the check-in process. Meeting participants, who are also employees of the organization, can also scan the QR code on the Room Management Display (RMD) and check-in.
Note: The time at which this notification is sent is configured by the admin in the Meeting Room Profile.
For example, if this time is set at 5 minutes and the meeting room is booked for 11:00 am, the notification will be sent at 10:55 am.
Meeting room check-in can be done either by:
- Scanning the QR code displayed outside the meeting room.
- Entering the MPIN on the Room Management Display (RMD) screen located outside the meeting room. If you forget your password, you can reset it. For details, refer to Changing MPIN.
Note: If the meeting organizer does not check-in within the time configured in the meeting room profile, the meeting room will be cancelled automatically and the room will be released for use by others. For example, if the meeting is scheduled at 11:30 AM, and the default time for check-in is 5 minutes after the meeting start time, the organizer has till 11:35 AM to check-in.
Once you check into a meeting room, based on the permissions and enabled features, the following options are available:
Sharing Meeting Room Control
The meeting organizer can share control of the room’s AC and lighting with one or more meeting participants. This option is available even before checking in for the meeting room.
Note: The Share Control option can also be configured in the user profile. If enabled, all meeting participants automatically receive room controls when the user books a meeting room. If disabled, the organizer can manually select which participants to share the controls with.
- In the Meeting Room module, under the Upcoming tab, tap the meeting that you have checked into.
- On the meeting screen, tap the
 icon.
- On the Share Control screen, select the participant(s) with whom you want to share control.
Note: Only the participants who are part of the organization will be listed on this page.
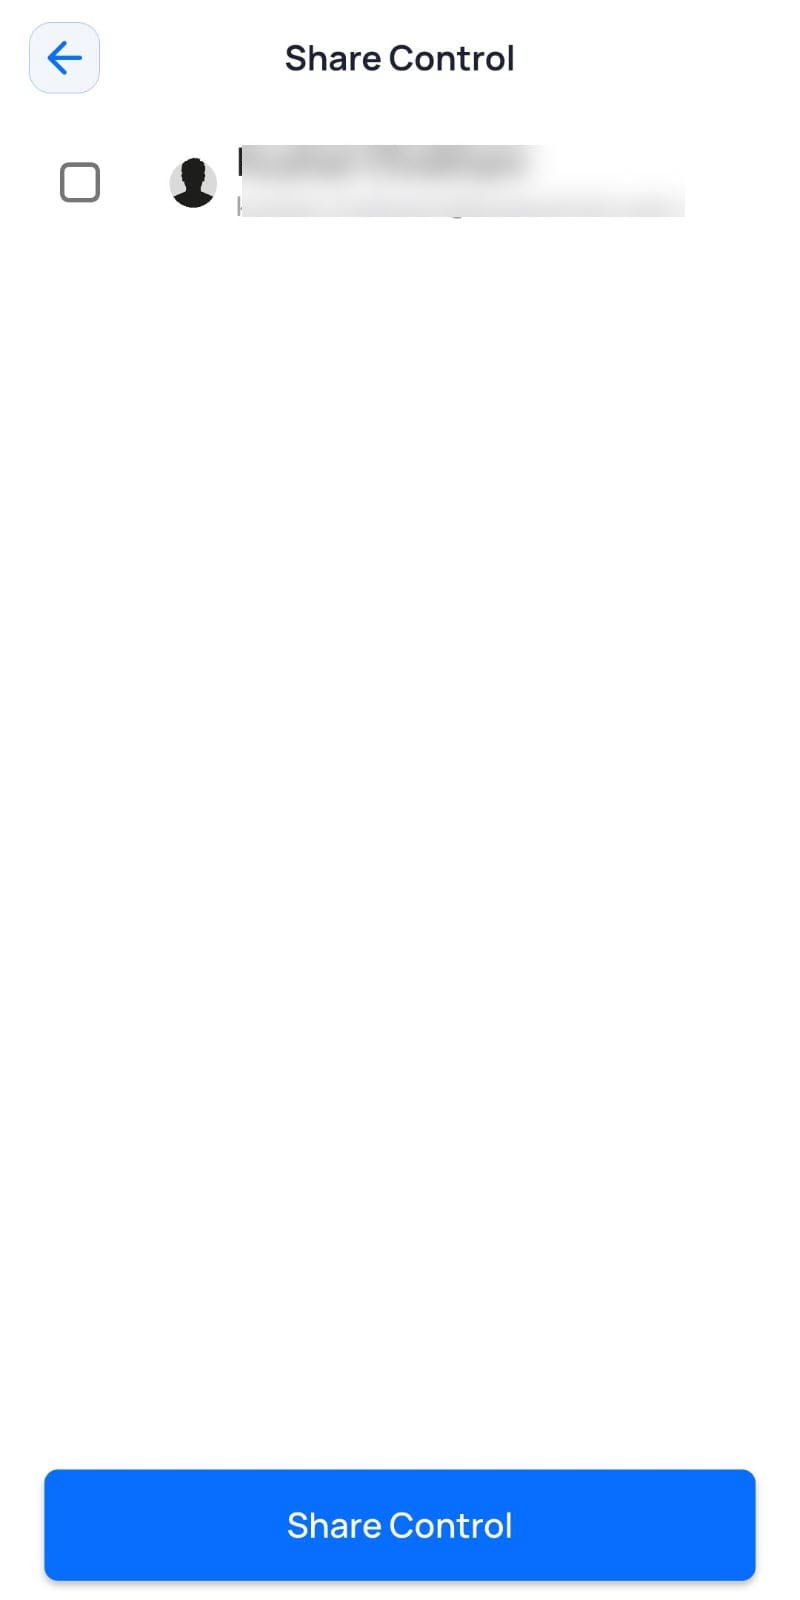
- Click Share Control.
The selected participants now have the permission to control the light and AC settings of the meeting room.
Placing Pantry Orders
Note: The option to place a pantry order is available to all meeting participants only if the feature is enabled by the admin and if the users have the necessary permissions.
Once a user has checked into the meeting room, you can place orders at the pantry that is servicing the meeting room.
- In the Meeting Room module, under the Upcoming tab, tap the meeting that you have checked into.
- On the meeting screen, tap Pantry.
- On the Select Pantry screen, tap Order.
- To place the order, refer to the steps given here.
Controlling Light Settings
Once the organizer has checked into the meeting room, they can control the light settings of the meeting room.
Note: By default, the option to control light settings is available only for the meeting organizer provided that the feature is enabled by the admin. The meeting organizer can also share control of light settings with other participants.
- In the Meeting Room module, under the Upcoming tab, tap the meeting that you have checked into.
- On the meeting page, tap Light.
Note: This option is displayed to only those users with whom control has been shared by the organizer.
The Control page displays the light settings for the meeting room. For steps on controlling the light settings, click here.
Controlling AC Settings
Once the organizer has checked into the meeting room, they can control the AC settings of the meeting room.
Note: By default, the option to control AC settings is available only for the meeting organizer provided that the feature is enabled by the admin.The meeting organizer can also share control of AC settings with other participants.
- In the Meeting Room module, under the Upcoming tab, tap the meeting that you have checked into.
- On the meeting page, tap AC.
Note: This option is displayed to only those users with whom control has been shared by the organizer.
The Control page displays the AC settings for the meeting room. For steps on controlling the AC settings, click here.
Canceling a Meeting
You can cancel meetings that were created using the app and not scheduled through Outlook, Gmail, or other calendars).
Note: This option is available only if it is configured in the profile associated with the meeting room.
- In the Meeting Room module, under the Upcoming tab, tap the meeting you want to cancel.
You can also access the meeting room booked for today from the dashboard, under Today’s activities. - To cancel this meeting, tap Cancel Meeting.
The meeting is cancelled and the meeting room is released and is available for booking by others.
Releasing the Meeting Room
In situations when you longer require a meeting room or your meeting ends earlier than the booking end time, you can release a meeting room to make it available for booking by others. You can do this from:
Releasing the Meeting Room from the App
- In the Meeting Room module, under the Upcoming tab, tap the meeting room you want to release.
Note: You can also access the meeting room booked for today from the dashboard, under Today’s activities.
- To release this meeting room, tap Release Room.
The meeting room is released and is available for booking by others.Note: This does not remove the event or meeting from the calendar. To completely cancel the event, you must manually remove it from the calendar.
Releasing the Meeting Room from the RMD
- To release the meeting room from the RMD, tap End Meeting and enter your MPIN.
Note: This does not remove the event or meeting from the calendar. To completely cancel the event, you must manually remove it from the calendar.