

You can invite a visitor either by:
Once the visitor has accepted the invite and is at the campus, they must complete the check-in process. This applies to both, visitors with an existing invitation and walk-in visitors.
Checking-in Invited Guests
- At the kiosk, tap TOUCH HERE.
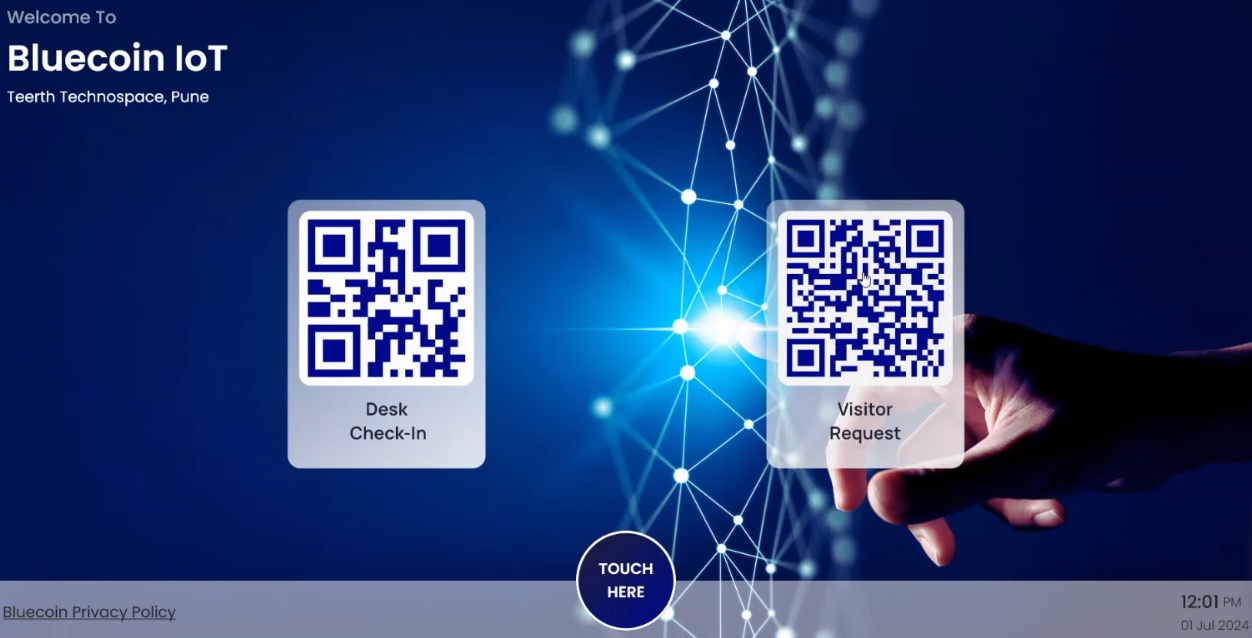
- On the next screen, tap Already have an invitation code.
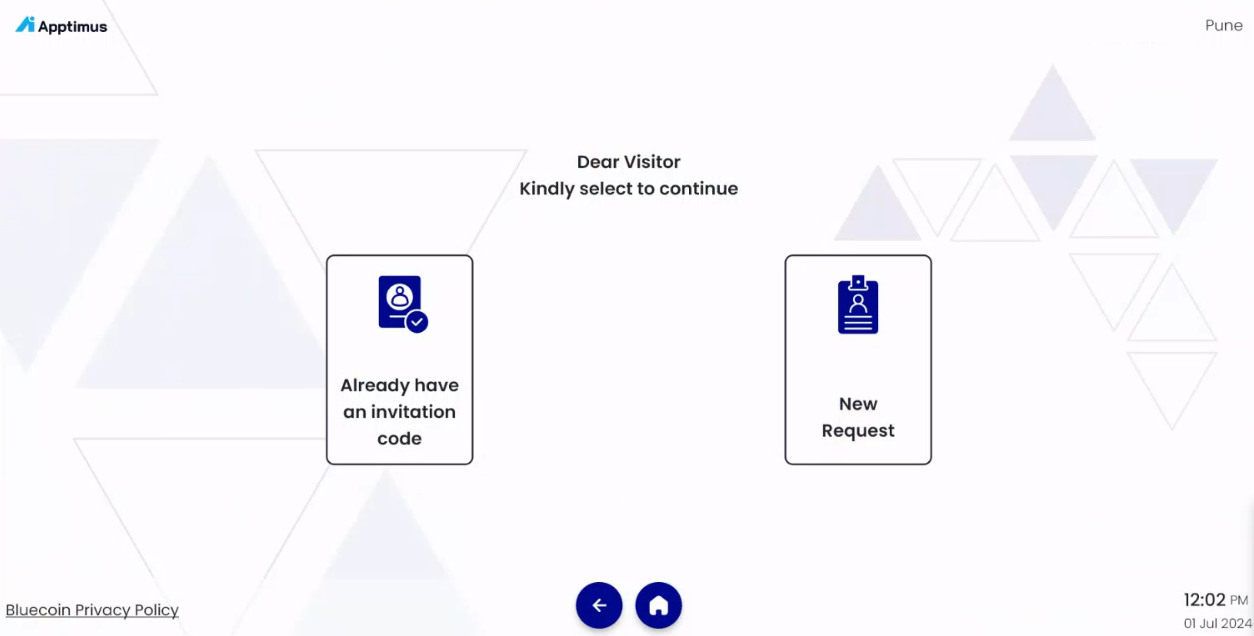
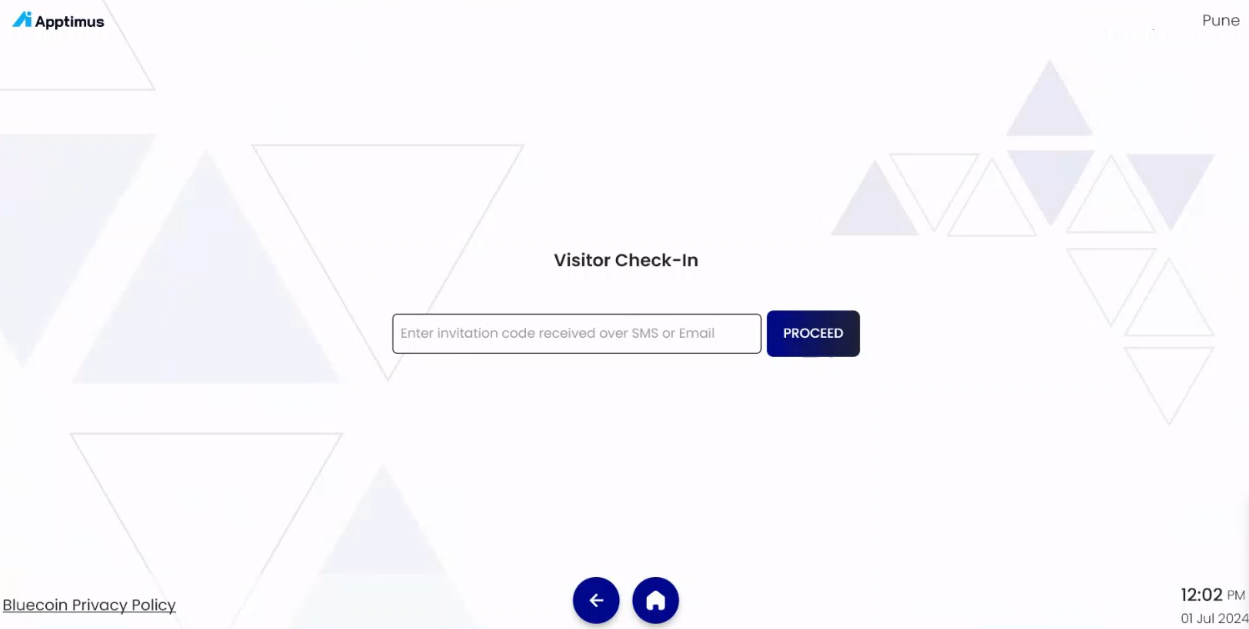
- On the Visitor Check-in screen, enter the 6-digit alpha-numeric invitation code received with the invitation SMS and tap Proceed.
- Check and update your Basic Details, if required, and then tap Next.
- Check and update any Additional Details, such as device details, and then tap Next.
- Check and update your Photo Details, by uploading your photo or clicking a new photo, and then tap Next.
The Visitor Pass is generated. - Tap PRINT PASS and Accept the Visitor Disclaimer.
The pass is printed and can be carried by the visitor inside the campus.
Checking-in Walk-in Guests
Walk-in guests can check-in at the kiosk in the following two ways:
Checking-in Visitors by Scanning QR Code
- At the kiosk, scan the Visitor Request QR code.
The link to raise a visitor request opens on the visitor’s mobile phone. Once the host accepts the requests, a 6-digit alpha-numeric invitation code is generated and sent to the visitor as an SMS.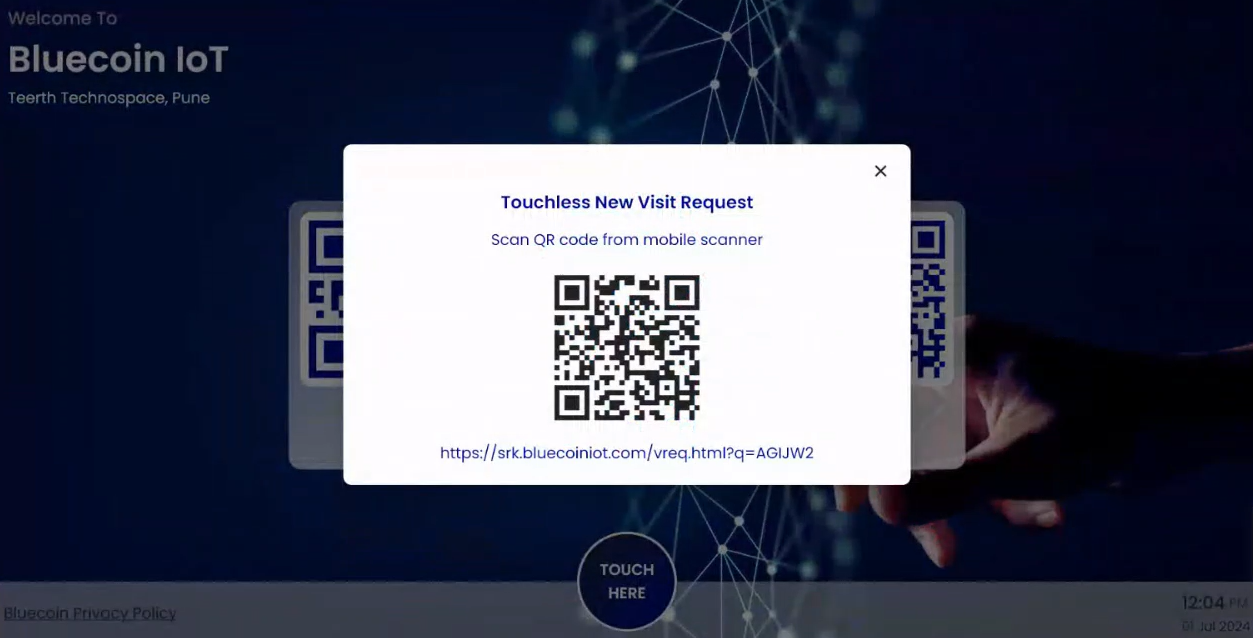
- At the kiosk, tap Touch Here.
- On the next screen, tap Already have an invitation code.
- On the Visitor Check-in screen, enter the 6-digit alpha-numeric invitation code received with the invitation SMS and tap Proceed.
- Check and update your Basic Details, if required, and then tap Next.
- Check and update any Additional Details, such as device details, and then tap Next.
- Check and update your Photo Details, by uploading your photo or clicking a new photo, and then tap Next.
The Visitor Pass is generated. - Tap PRINT PASS and Accept the Visitor Disclaimer.
The pass is printed and can be carried by the visitor inside the campus.
Checking-in Visitors by Raising a Visitor Request
- At the kiosk, tap Touch Here.
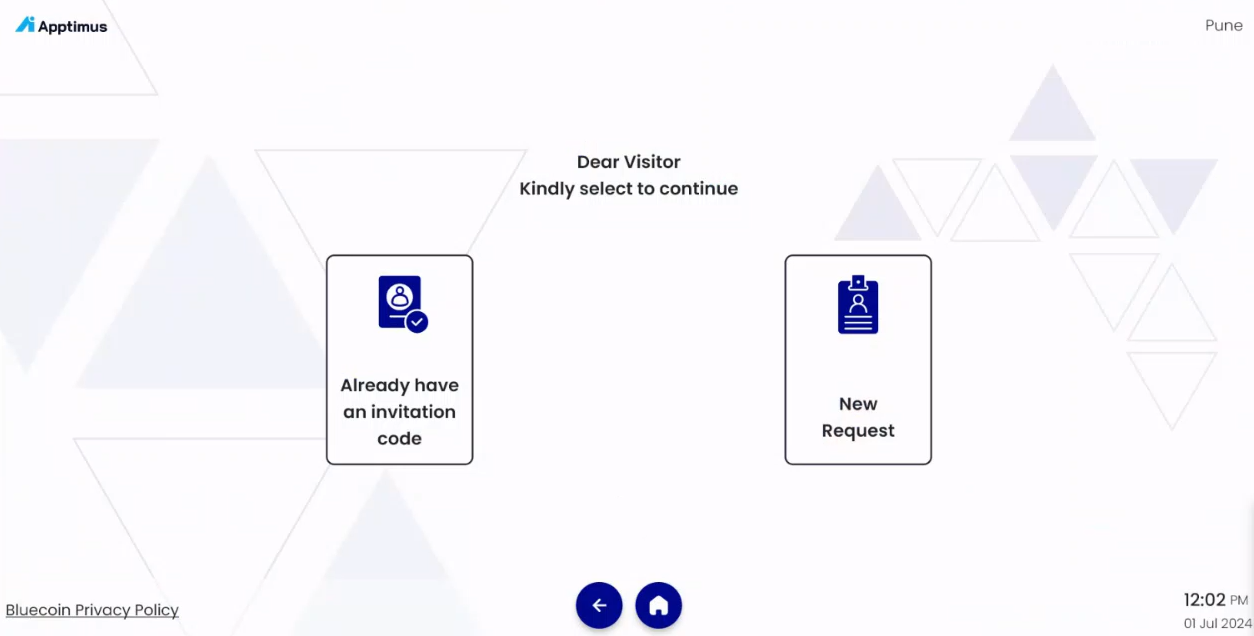
- On the next screen, tap New Request.
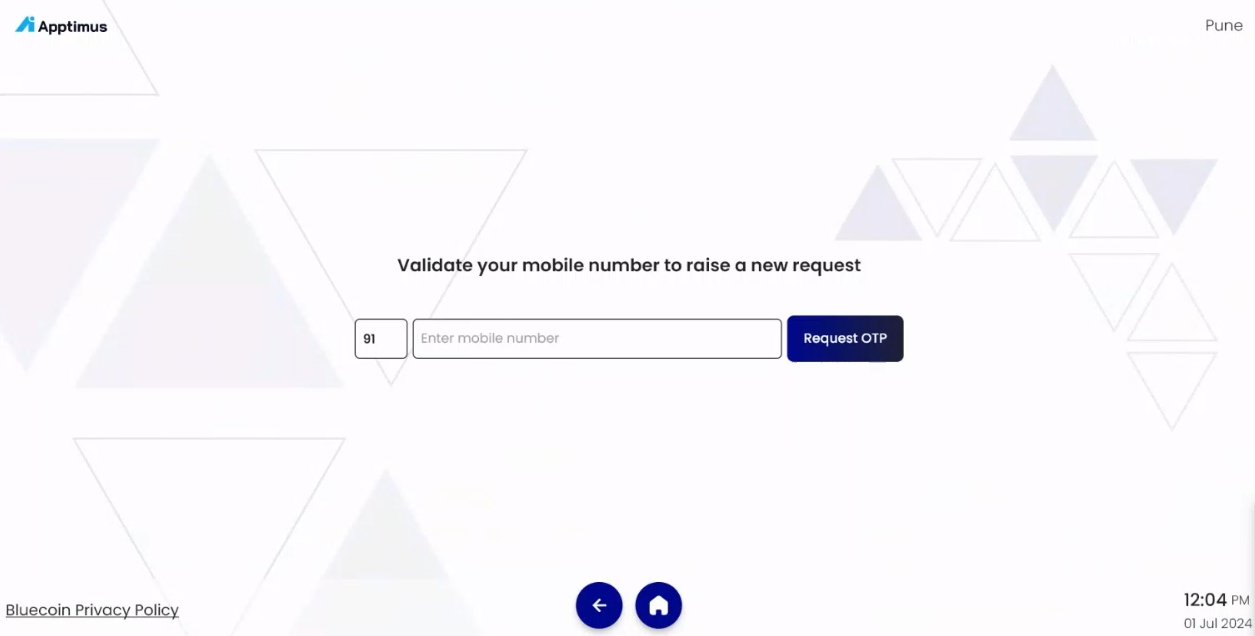
- Enter your mobile number and tap Request OTP.
- Enter the OTP received on your mobile phone and then tap Proceed.
- Check and update your Basic Details, if required, and then tap Next.
- Check and update any Additional Details, such as device details, and then tap Next.
- Check and update your Photo Details, by uploading your photo or clicking a new photo, and then tap Next.
- To add more visitors to the visitor request, tap +ADD VISITOR.
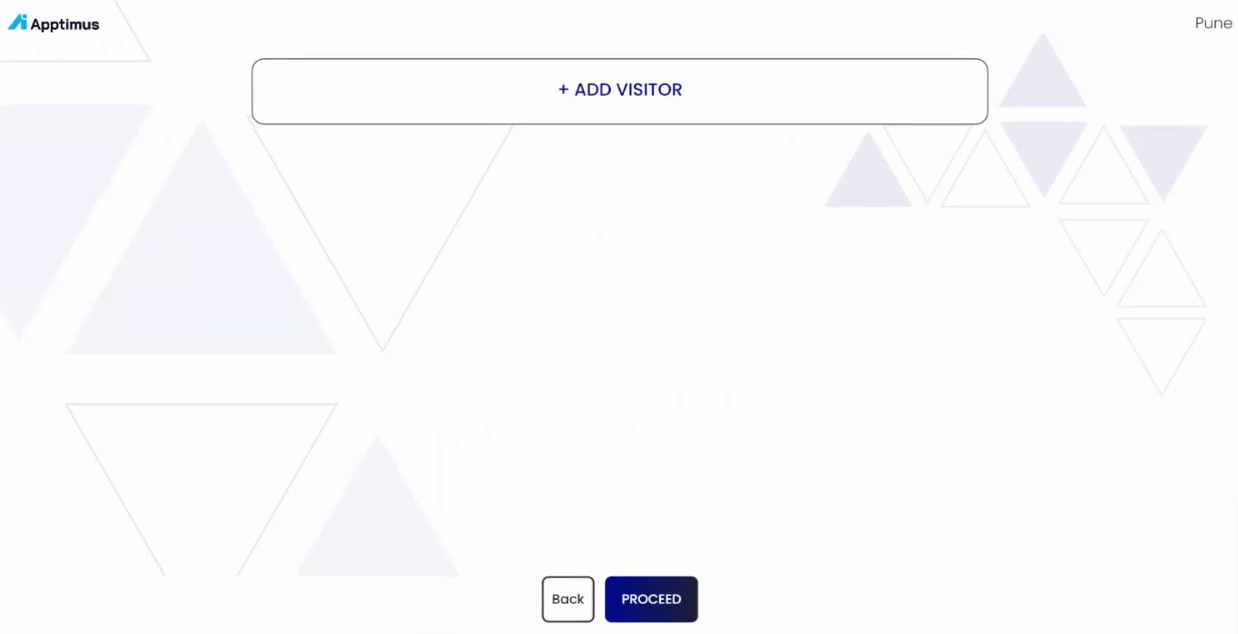
- Tap PROCEED.
- On the Request Visit screen, enter or select the required information.
Field Description Purpose
Select the purpose of the visit.
Title
Enter the title of the visit.
Whom to meet
Type the email address and select the person you are visiting.
Duration
Select the duration of the visit.
Message
Enter any additional details, if required.
- Tap Request Visit.
Once the host accepts the visit request from the Apptimus app, the visitor receives a notification with the 6-digit alphanumeric code. - At the kiosk, tap Touch Here.
- On the next screen, tap Already have an invitation code.
- On the Visitor Check-in screen, enter the 6-digit alpha-numeric invitation code and tap Proceed.
- Check and update your Basic Details, if required, and then tap Next.
- Check and update any Additional Details, such as device details, and then tap Next.
- Check and update your Photo Details, by uploading your photo or clicking a new photo, and then tap Next.
The Visitor Pass is generated. - Tap PRINT PASS and Accept the Visitor Disclaimer.
The pass is printed and can be carried by the visitor inside the campus.