
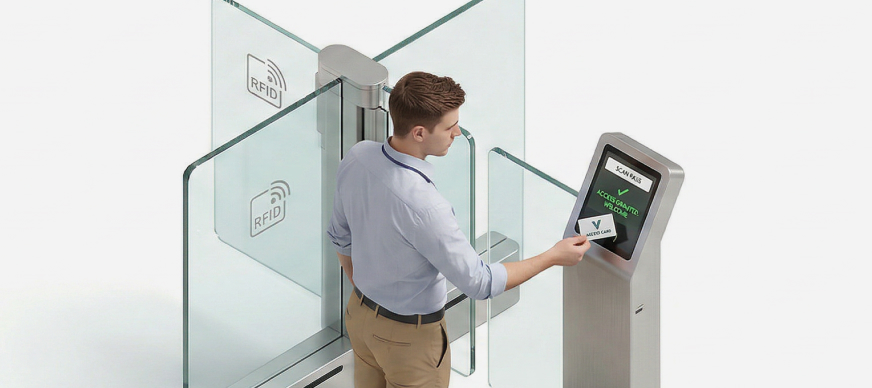
You can manage pre-approved entries by:
- Issuing entries
- Assigning custom passcodes for pre-approved entries
- Filtering pre-approved entries
- Printing entry passes
- Canceling a pre-approved entry
- Checking out pre-approved users
- Viewing check in and check out details
The Pre-Approved Entry section helps you manage all pre-approved entries at your office. You can filter these requests by name, mobile number, entry status, or date and easily print entry passes for users who have been pre-approved by their host(s). At the end of the workday, you can also check out these employees from the campus.
- In the Main Menu, under the ADMIN OPTIONS, in the Entry Management subsection, click Pre-approved Entry.
The Pre-approved Entry page is displayed with the Default Mode tab open by default. The Summary Header on top of the page provides the following information:- Issue Entry: Allows you to issue entries.
- TOTAL CHECKED IN: Displays the total number of checked in users.
- TOTAL CHECKED IN TODAY: Displays the total number of checked in users for the current day.
- TOTAL CHECKED OUT TODAY: Displays the total number of users checked out for the current day.
The Default Mode tab displays the following information about the issued entry passes valid for the current day:
|
Toolbar Options |
|
|---|---|
| Filter by User Email / Mobile |
Allows you to filter the entry pass by user email or mobile number. |
| Select Entry Status |
Allows you to filter by the status of the entry pass request as Approved, Rejected, Cancelled, and so on. |
| Date Range |
Allows you to filter entry passes as per the selected date range. |
Refresh icon  |
Refreshes the filter parameters. |
|
Table Fields |
|
| User |
Displays the name of the user to whom the entry pass is issued.. |
| Host |
Displays the name of the host. |
| Status |
Displays the status of the entry pass. |
| Created By |
Displays the name of the user who issued the entry. |
| Created At |
Displays the date and time at which the user was issued an entry. |
| Valid From |
Displays the date from which the user’s entry is valid. |
| Valid To |
Displays the date until which the user’s entry is valid. |
| Action |
Allows you to:
|
The All Checked In User tab displays the following information:
| Field | Description |
|---|---|
|
User |
Displays the name of the checked in user. |
|
Checked In |
Select the date and time at which the user was checked in. |
|
Action |
Allows you to check out the user. |
Issuing Entries
The Entry Management module allows you to issue entries in the following two ways:
- Individually (One by One): This is suitable when you need to issue entries for a small number of people.
- Bulk Upload: This is recommended when you need to issue entries for a larger group at once.
Issuing Entries Individually
To issue entries one at a time, you need to enter the details for each individual manually and generate an entry pass.
- In the Main Menu, under the ADMIN OPTIONS, in the Entry Management subsection, click Pre-approved Entry.
The Pre-approved Entry page is displayed. - Click Issue Entry.
The Issue Entry pop-up is displayed. - Enter or select the required field information.
Field Description Campus
Displays the name of the campus. Date Range
Select the date range for which the entry pass is to be issued. Remarks
Enter any remarks for the entry, if required. Bulk Upload Allows you to upload entries in bulk. For more information, click here.
Existing User In case of employees, select the employee for whom the entry is to be issed.
Guest Type In case of guests, select the type of guest from the dropdown.
External User Image If the entry is for an external user, upload their image.
Guest Email Enter the email address of the guest. Guest Mobile Number Enter the guest's mobile number. - Click Issue.
Bulk Upload of Entries
To issue entries in bulk, you can download a sample file from the system, add details of all individuals who require access, and upload the file back to the system. The system processes the file and automatically issues entry to all listed users, saving time and reducing manual effort.
- In the Main Menu, under the ADMIN OPTIONS, in the Entry Management subsection, click Pre-approved Entry.
The Pre-approved Entry page is displayed. - Click Issue Entry.
The Issue Entry pop-up is displayed. - Click Bulk Upload, and then click Download Sample Excel Format.
A sample Excel sheet is downloaded. - Enter the following details in the sheet.
Column Description Campus
Displays the name of the campus. Date Range
Select the date range for which the entry pass is to be issued. Remarks
Enter any remarks for the entry, if required. - In the Issue Entry window, click Bulk Upload, and then again click Bulk Upload.
- Upload the updated Excel sheet.
- Click Issue.
All the entries from the Excel are issued.
Assigning Custom Passcodes for Pre-approved Entries
You can assign a custom passcode for a pre-approved entry. This can be done at the time of doing a bulk upload when you are issuing entries.
- In the Main Menu, under the ADMIN OPTIONS, in the Entry Management subsection, click Pre-approved Entry.
The Pre-approved Entry page with details of all pre-approved entries is displayed. - Click Issue Entry.
The Issue Entry window opens. - In the Bulk Upload dropdown, click Download Sample Excel Format.
A sample Excel file for bulk upload is downloaded. Refer to Bulk Upload of Entries for details. - To assign a specific passcode for an entry, add a new column named Custom Code after the Remarks column and enter the custom code for the corresponding user. If the entered code is already assigned to another user, the system will display an error. In such a case, you must provide a different custom code.
Note: The custom code must be exactly six characters long and consist of uppercase letters (A-Z) and numbers (0-9) only.
- Once all entry details are added to the file, save the file.
- In the Issue Entry window, in the Bulk Upload dropdown, click Bulk Upload.
- Upload the saved file.
Filtering Pre-Approved Entries
- In the Main Menu, under the ADMIN OPTIONS, in the Entry Management subsection, click Pre-approved Entry.
The Pre-approved Entry page with details of all pre-approved entries is displayed. - To filter the pre-approved entry details by users’ email address or mobile number.
- Select Entry Status: Allows you to filter the pre-approved entry details by the status such as approved, rejected, and so on.
- Date Range: Allows you to filter the pre-approved entry details by date.
Printing Entry Pass for Pre-Approved User
- In the Main Menu, under the ADMIN OPTIONS, in the Entry Management subsection, click Pre-approved Entry.
The Pre-approved Entry page with details of all pre-approved entries is displayed. - To print an entry pass, under the Action column, click the Pass
 icon for the required user.
- In the Verify Passcode and Print Entry pop-up window, enter the Passcode received by the user when their entry was approved.
- Click Verify and View.
- Once the passcode is verified successfully, the following options are available:
- Upload User Image: Allows you to upload a photo of the user to be printed on the entry pass.
- Print: Allows you to download the entry pass for printing.
- Check-in: Allows you to check-in the user.
Cancelling a Pre-Approved Entry
You have the option to cancel an existing pre-approved entry when it is no longer required.
- In the Main Menu, under the ADMIN OPTIONS, in the Entry Management subsection, click Pre-approved Entry.
The Pre-approved Entry page with details of all pre-approved entries is displayed. - To cancel a pre-approved entry, under the Action column, click the
 icon for the required user.
- In the Cancel Entry Request pop-up, enter remarks for cancellation (if required).
- Click Cancel.
A notification is sent to the user informing them that entry has been cancelled.
Checking out a Pre-Approved User
- In the Main Menu, under the ADMIN OPTIONS, in the Entry Management subsection, click Pre-approved Entry.
The Pre-approved Entry page with details of all pre-approved entries is displayed. - Click the All Checked In User tab.
- Under the Action column, click Check Out for the employee that you want to check out of the campus.
- In the Check Out pop-up window, enter a Comment (if required) and then click Check Out.
The employee is checked out.
Viewing Check in and Check Out Details
- In the Main Menu, under the ADMIN OPTIONS, in the Entry Management subsection, click Pre-approved Entry.
The Pre-approved Entry page with details of all pre-approved entries is displayed. - Under the Action column, click the
 icon for the user whose details are to be viewed.
The Event Details pop-up window displays the date and time of all check in and check out events for the user.