
When booking a desk, you can you can book a desk for yourself and also book desks for your colleagues
- On the Dashboard screen, tap Desk Booking and then tap New Booking.
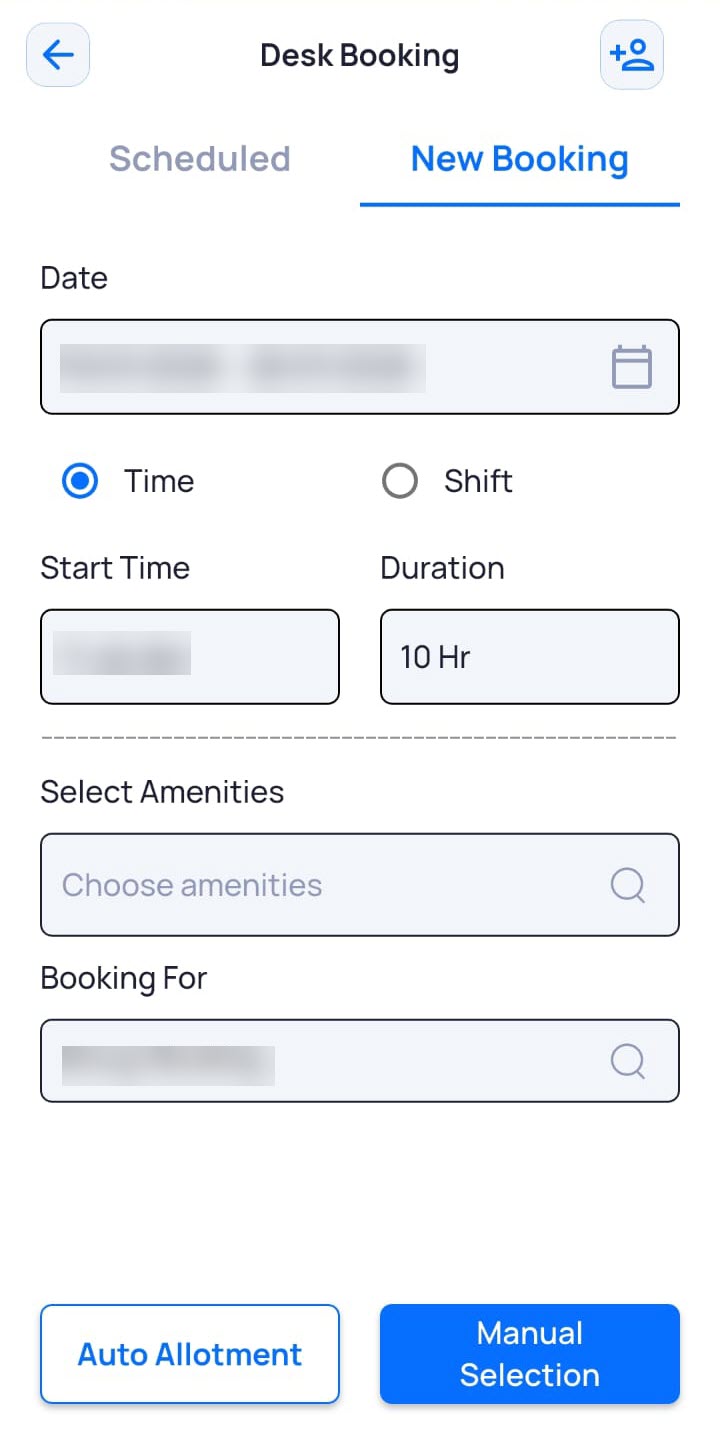
- To select the date(s) for the desk booking:
- Tap the Date field or the calendar icon.
The pop-up screen to select a date is displayed. - Tap the quick options (Today, Tomorrow, This Week or Next Week) to select the dates.
OR
Tap the dates on the calendar for which you want to book the desk. You can select multiple consecutive dates by clicking on the first date and then clicking on the last date for which you want to book the desk. - To repeat the desk booking, tap the respective days. For example, all Mondays, Wednesdays and Fridays, and so on
OR
Tap the Select All checkbox to select all the days of the week.Note: Recurring desk bookings are not permitted when booking desks near a colleague.
- To exclude holidays for desk booking, tap the Exclude Holidays checkbox.
- To clear the selected dates, tap Clear.
- To save your selected dates, tap OK.
- Tap the Date field or the calendar icon.
- In the Time field, enter the Start Time and Duration for the desk booking.
- To book a desk for a particular shift:
- Tap Shift.
- Select the shift from the quick options.
Note: If a shift is already assigned to you in the campus where you are booking the desk, the assigned shift will be displayed by default.
- To select the Amenities:
- Enter and select the amenities you need with the desk from the available options.
- Tap Done.
- In the Booking For field, by default, your name is displayed in this field.
Additionally, to book the desk for one or more colleagues:- Tap the Booking For field.
- Search the name of your colleague.
- Tap the name to select the colleague.
- Repeat steps a to c to add other colleagues.
- Tap Done.
- To book the desk near a colleague:
- Tap the Find colleague field.
- Search for the name of your colleague.
- Tap the name to select the colleague.
- Tap Done.
Note: This works only if the colleague already has a desk booking.
- To allot desks automatically, tap Auto Allotment.
The desk(s) are booked automatically and a Desk Booking Confirmation email and notification is sent to the users for whom the desk booking was done.
The details of your desk booking are available on the dashboard under Today’s Activities (if the desk booking is scheduled for the current date) and in the Desk Booking module under the Scheduled tab. - To manually select desks from the floor plan, tap Manual Selection.
The floor plan view opens and displays all Available, Not Available, and Selected desks. By default, availability is shown based on assigned desks. In case assigned desks are not available the user can go to the filters at the top right corner and change the view to show all. This will show all the available desks from the desks which are not assigned to any individual or group as well.
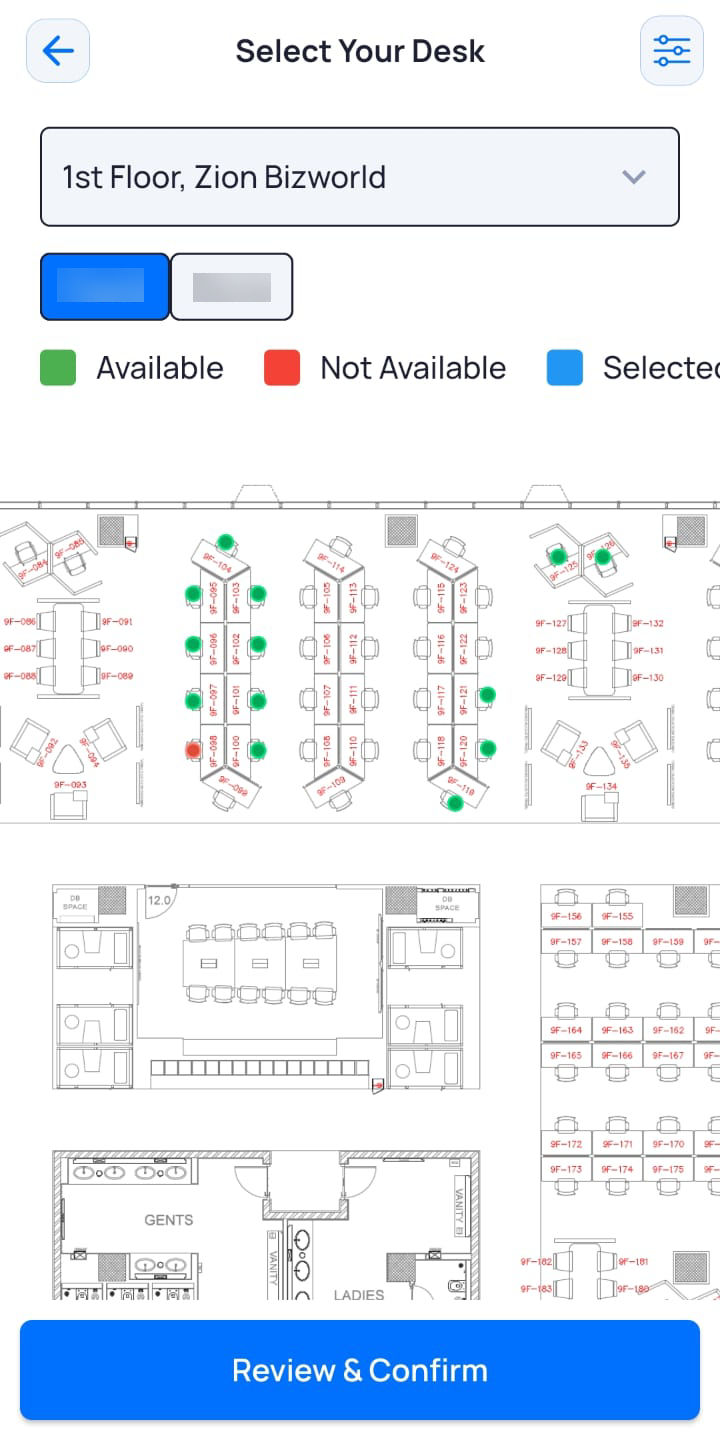
- Tap an available desk to select it.
- Tap your colleagues and then tap another available desk to select it.
- Repeat step b to select desk(s) for other colleague(s).
- Tap Review & Confirm.
- On the Desk Details pop-up that is displayed, tap Confirm & Book Desk.
The desk(s) are booked automatically, and a Desk Booking Confirmation email and notification is sent to the users for whom the desk booking was done.
The details of your desk booking are available on the dashboard under Today’s Activities (if the desk booking is scheduled for the current date) and in the Desk Booking module under the Scheduled tab.